How to Connect a Hydrific Droplet to WashConsole
A step-by-step guide to streaming your Hydrific Droplet's water-flow data into WashConsole over encrypted MQTT: provision credentials in WashConsole, paste them into the Hydrific app, and watch live flow, daily usage, and leak alerts show up on your Sensors page. Includes the two mistakes that trip most people up.

What you'll get
The Hydrific Droplet is a clamp-on water-flow sensor. Once it's streaming to WashConsole, your Sensors page shows the Droplet's live flow (L/min), today's water usage, peak flow, signal strength, and a leak-watch alert you can set to email and push your managers when water runs longer than it should.
The Droplet talks to WashConsole over encrypted MQTT (MQTTS): it connects straight to our broker with TLS, so nothing extra runs on-site. Setup is a one-time copy of a handful of values from WashConsole into the Hydrific phone app.
Before you start
Step 1. Generate credentials in WashConsole
12A0. WashConsole mints a set of credentials scoped to that one device.This is the #1 thing to get right. The id you type becomes the device's security scope. If the Droplet's id is12A0and you type120A, the Droplet will connect but every reading it sends is rejected, and it never shows up on your Sensors page. Copy the id character-for-character from the Hydrific pairing screen: don't type it from memory.
WashConsole then shows you a set of values to copy: Host Name, Port Number, Username, Password, Discovery Prefix, Status Topic, and a CA Certificate. Keep this screen open; you'll paste each one into the Hydrific app next. (The password is shown once; reopen Add Droplet later or use Rotate password if you need it again.)
Step 2. Open the MQTT integration in the Hydrific app
In the Hydrific app: Menu → Droplet Settings → Smart Home Integrations → Choose integration → MQTT.
Then Pair to Droplet. Let it scan and select your Droplet when it appears (its id, e.g. Droplet-12A0, is shown on the card), and tap Continue.
Step 3. Enter the WashConsole MQTT settings
Now fill in the MQTT form. The field names in WashConsole match the Hydrific app's field names exactly. Copy each value into the field with the same name, top to bottom.
| Hydrific field | What to paste |
|---|---|
| Host Name | The broker host from WashConsole. Paste it exactly: a single typo shows up as the Droplet's "Error 108". |
| Port Number | 8883 |
| Username | The wc-…-droplet-… value. This is your credential, not the Host Name. |
| Password | The long random string from WashConsole. |
| Discovery Prefix | The wc/… value. This is not the Password. |
| Status Topic | The wc/…/status value from WashConsole. Replace the app's homeassistant/status default: our broker only authorizes this topic. |
Turn TLS Encryption ON, then paste the CA Certificate as the whole block, including the `-----BEGIN CERTIFICATE-----` and `-----END CERTIFICATE-----` lines. Don't retype it or let the app reformat it: a mangled certificate is the Droplet's "Error 102".
Tap Authenticate: the app confirms with Connection established.
Step 4. Claim it in WashConsole
Back in WashConsole's Sensors page, your Droplet appears under Discovered devices within about 30 seconds of connecting. Tap Claim…, pick Hydrific Droplet: Water-Flow Sensor, and assign it a zone and equipment so its readings and alerts route to the right place.
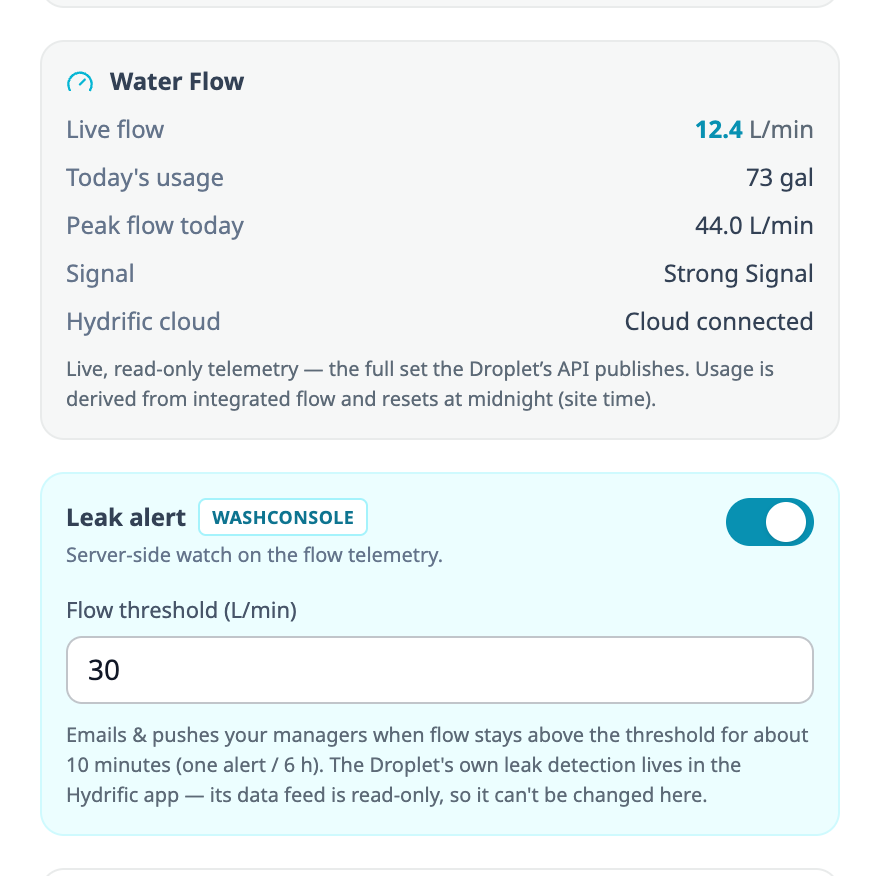
That's it. You'll see live flow and today's usage on the card, a 24-hour flow trend in the device detail, and you can set a leak-watch threshold so WashConsole alerts your managers when flow stays high for too long.
Troubleshooting: "it connected, but I don't see it"
"Connection established" in the Hydrific app only means the login worked, not that readings are getting through. If the Droplet doesn't appear on Sensors, check these in order:
…-droplet-XXXX) must match the Droplet's real id from the pairing screen exactly. 12A0 and 120A are not the same; if they don't match, the broker accepts the login but rejects every reading. Re-open Add Droplet with the correct id, copy the fresh Username + Password, and paste them in.wc-… value, not the broker host.wc/… value, not the password.wc/…/status value, not homeassistant/status.BEGIN/END lines and TLS is ON.WashConsole's Add Droplet screen has a live connection check that watches for your Droplet and calls out these exact issues if it doesn't see readings within a couple of minutes.
A note on how it works
The Droplet publishes telemetry only: flow, volume, signal, and health. It doesn't accept remote commands, and its own leak detection lives in the Hydrific app. WashConsole does its own continuous-flow leak alerting on top of the live data, so the leak threshold you set in WashConsole is a WashConsole alert, not a change to the device. Your water data also continues to flow to Hydrific's (LIXIL's) cloud as usual, adding the WashConsole path doesn't change that.